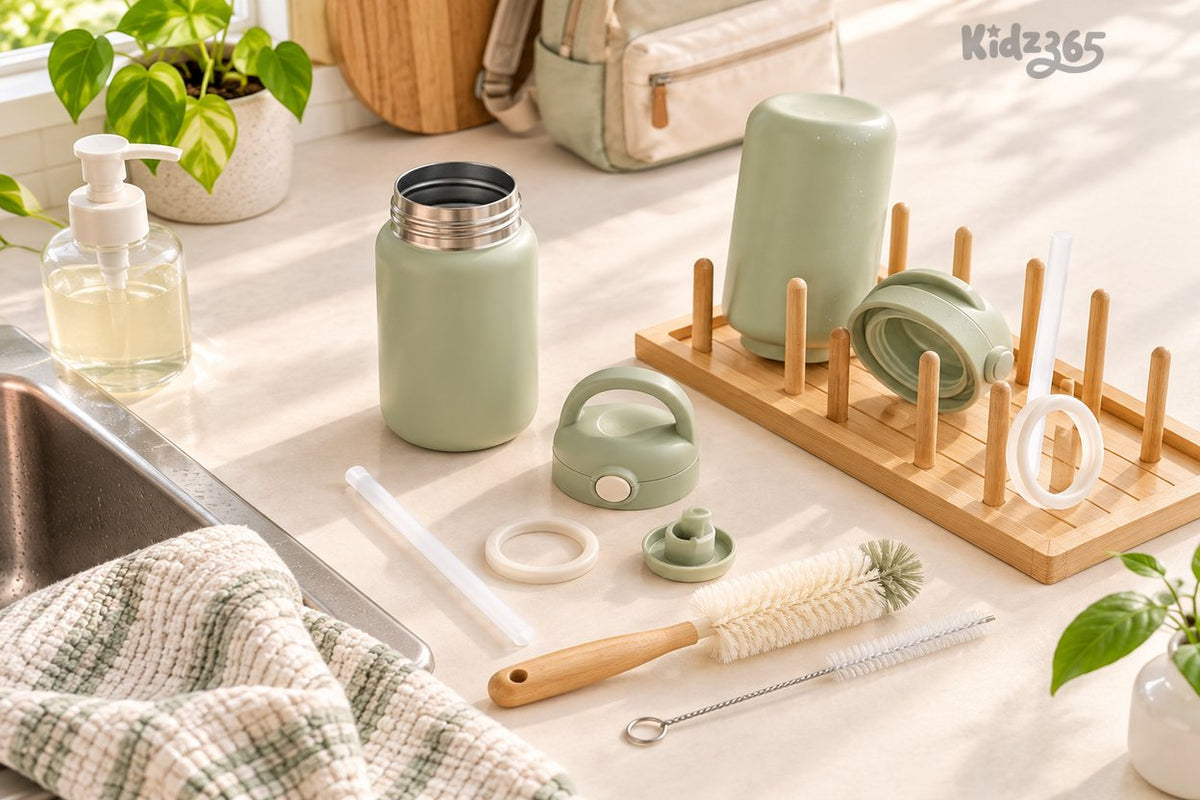
A school water bottle can look clean and still smell a little… questionable by Friday. The fix does not need to become another complicated evening chore.
The short answer: empty the bottle when it comes home, take apart every removable piece, scrub the bottle, lid, straw and seals with warm soapy water, rinse well, then let everything air-dry completely before putting it back together. If the manufacturer says the bottle is dishwasher-safe, that can simplify the routine.
The Kidz365 5-minute routine: Empty · Take Apart · Scrub · Air-Dry
1. Empty
Pour out leftover water instead of topping off yesterday’s bottle. If the bottle held anything other than plain water, clean it promptly rather than letting residue sit overnight.
2. Take apart
Remove the cap, straw, mouthpiece, valve and removable silicone gasket if your bottle is designed for those parts to come out. Hidden seams and seals are easy to miss when the lid stays assembled.

3. Scrub
Use warm water, dish soap and a clean bottle brush. A thin straw brush is useful for straws and narrow spouts. Pay extra attention to threads, the underside of the cap and the groove where a silicone seal sits.
This is also a good moment to follow the bottle maker’s care instructions. Some parts can go in the dishwasher; others can warp or degrade with high heat.
4. Air-dry
Leave the bottle and every part open and separated until fully dry. Trapping moisture by rebuilding the bottle too soon can keep the little crevices damp.
Three spots parents often miss
The gasket: If it is removable, clean both the gasket and the groove beneath it.
The straw or bite valve: Run a narrow brush all the way through instead of only rinsing the opening.
The lid threads: Soap and a small brush can reach the ridges where residue collects.

What if the smell comes back?
First, check whether a hidden seal or valve was missed. Then inspect the bottle and removable parts for cracks, deep scratches, damage or pieces that no longer come clean. Follow the manufacturer’s replacement guidance for worn components rather than trying increasingly harsh cleaners.
If you see visible mold, Cleveland Clinic recommends fully disassembling the bottle, washing each component with soap and scrubbing hard-to-reach areas, then allowing everything to dry completely. For children with a weakened immune system or other special medical needs, ask their care team whether they recommend additional sanitation steps.
Two school-day habits that help
Give the bottle one home after school. Put it beside the sink as soon as the backpack is unpacked. A routine is easier to remember than a rescue clean at bedtime.
Make it easy to identify. A labeled bottle is less likely to be mixed up with another child’s. Our daycare and school labeling guide includes a quick system for bottles, lunch gear and other easily misplaced items.
For everyday hydration, the American Academy of Pediatrics recommends making water readily available to children throughout the day. The bottle itself does not need to be fancy; it needs to be easy for your child to use and easy for your family to clean.
Care note: Always follow the bottle manufacturer’s washing, dishwasher and replacement instructions. School, daycare or local public-health guidance may be stricter in some situations.
Sources consulted
Cleveland Clinic: Mold in Water Bottle? Health Facts and How To Clean It
American Academy of Pediatrics / HealthyChildren: Choose Water for Healthy Hydration
CDC: Cleaning and disinfecting early care and education settings
Image credits
Inline image 1: Greta Hoffman / Pexels — source photo. Reuse basis: Pexels License; free commercial and non-commercial use, attribution not required.
Inline image 2: RDNE Stock project / Pexels — source photo. Reuse basis: Pexels License; free commercial and non-commercial use, attribution not required.